Jenkins Installation and Freestyle Project


Installation of Jenkins
Login to your AWS account and create a New EC2 Instance, and Connect to your EC2 instance via SSH
Refer to Jenkins Official Installation Docs for the installation steps:- https://www.jenkins.io/doc/book/installing/linux/
Upgrade all installed packages and Install Java, as Jenkins requires the Java Runtime Environment (JRE)
Upgrade all installed packages to their latest available versions.
sudo yum upgrade -yInstalling Java 11 on Amazon Linux [Add required dependencies for the Jenkins package]
sudo yum install java-11-openjdkIf the above did not work, check for the Java packages available using
yum list java| grep java- | grep devel
yum install java-11-amazon-corretto-devel.x86_64 -yVerify the Java Version:-
java -version
Install Jenkins
Download the Repo file jenkins.repo at yum repo directory [/etc/yum.repos.d/]
sudo wget -O /etc/yum.repos.d/jenkins.repohttps://pkg.jenkins.io/redhat-stable/jenkins.repoGet the Repolist
sudo yum repolistImport the cryptographic key of a package repository. This key is used to verify the integrity and authenticity of the packages obtained from that repository.
sudo rpm --importhttps://pkg.jenkins.io/redhat-stable/jenkins.io-2023.keyVerify the cryptographic key gets imported.
rpm -qa gpg-pubkey-[KEY]
Get detailed information about a specific GPG key in the RPM keyring, usingsudo rpm -qi gpg-pubkey-[KEY]
sudo rpm -qa gpg-pubkey | tail -1 | xargs -I {} rpm -qi {}Install Jenkins
sudo yum install jenkins -y
sudo systemctl daemon-reloadYou can enable the Jenkins service to start at boot with the command:
sudo systemctl enable jenkinsYou can start the Jenkins service with the command:
sudo systemctl start jenkinsYou can check the status of the Jenkins service using the command:
sudo systemctl status jenkinsCheck for errors if any
sudo journalctl -xeu jenkins.serviceAdd Jenkins user to the Docker Group
sudo usermod -aG docker jenkins
By default, Jenkins runs on port 8080, so you'll need to open this port in your security group to access the Jenkins Web Interface.
Allow Incoming Traffic for Port 8080, in AWS - Security Groups -> Inbound Rules
- Specific My IP in Source which will be able to access the Jenkins UI.
You can also specify your Bastion Host IP or VPN IP Or if you are using a Dedicated IP shared by your ISP.
Additionally, you can check your IP here: showmyip.com
- Specific My IP in Source which will be able to access the Jenkins UI.


Browse the URL in the browser
http://<IP>:8080
i.e
http://54.87.45.80:8080/You should see the Jenkins login screen. If this is your first time accessing Jenkins, you will need to retrieve the initial administrative password.
To do this, SSH into your EC2 instance and run the following command to retrieve the password from the Jenkins log file:sudo cat /var/lib/jenkins/secrets/initialAdminPassword
Copy and paste the password into the Jenkins login screen and click "Continue". You should now be on the Jenkins home screen and can start using Jenkins.

The setup prompts to either Install suggested plugins or Select plugins to install. Go with suggested plugins:


Create First Admin User for your Jenkins administrator,
then click Save and Continue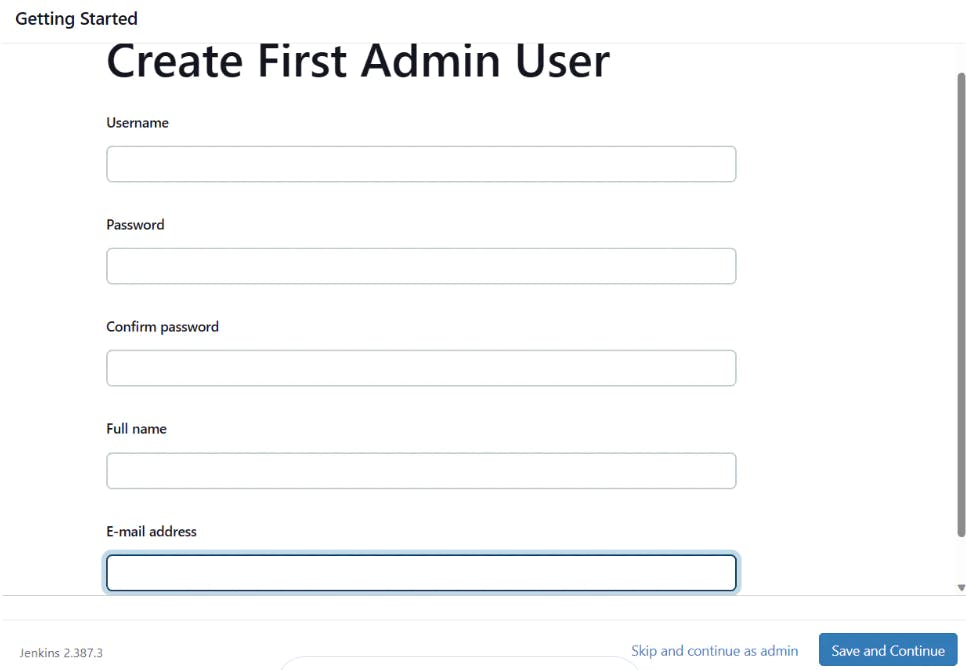
Set up the Instance Configuration. This is the preferred network address for this Jenkins installation. Confirm the address you want to use for your server. This is most likely the same address you used to get to this configuration page.


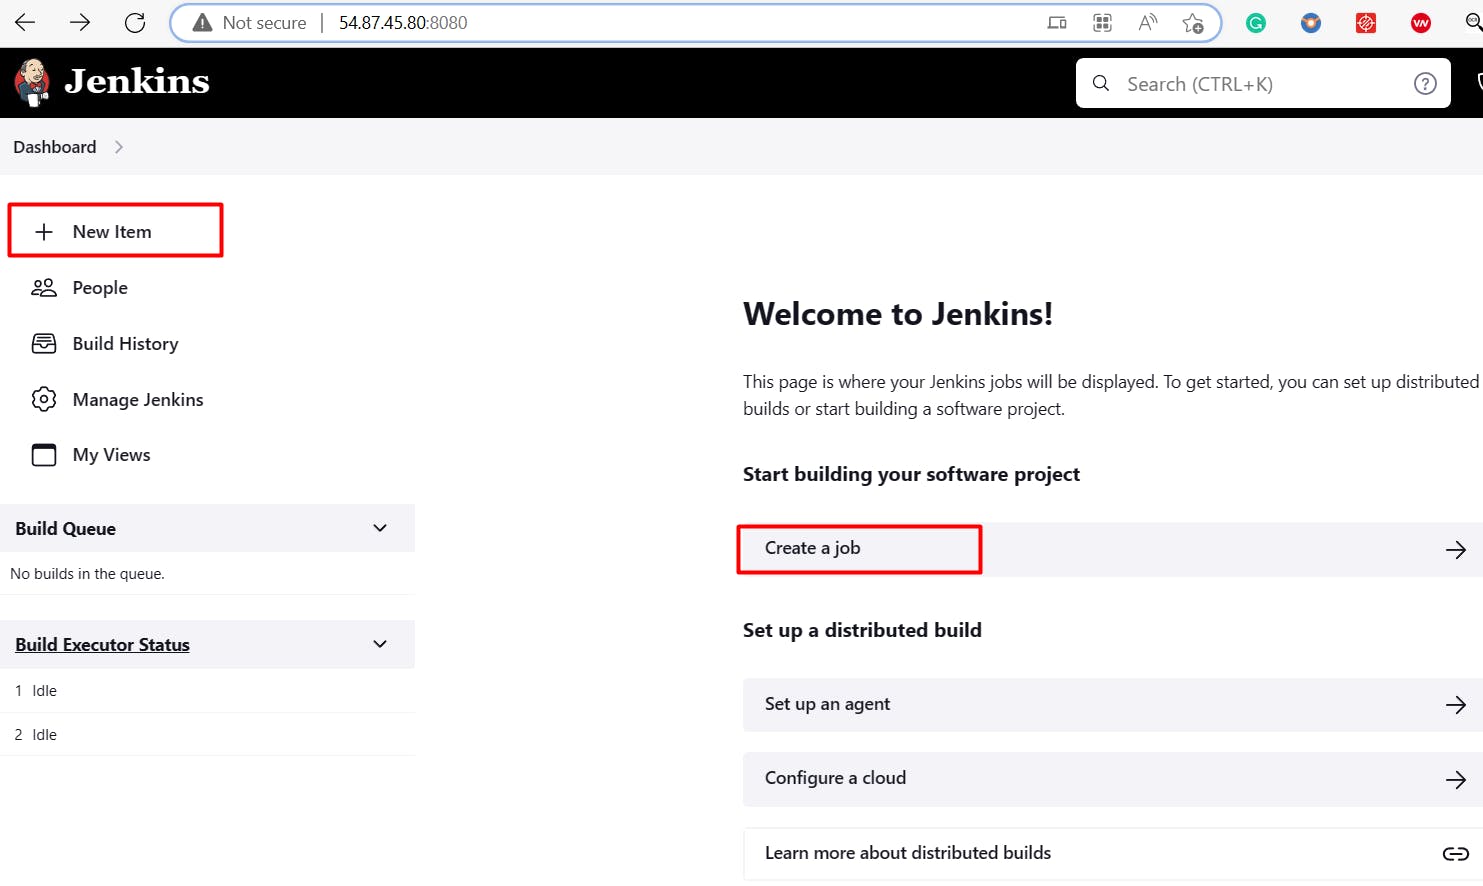
Now we are into the Jenkins dashboard.

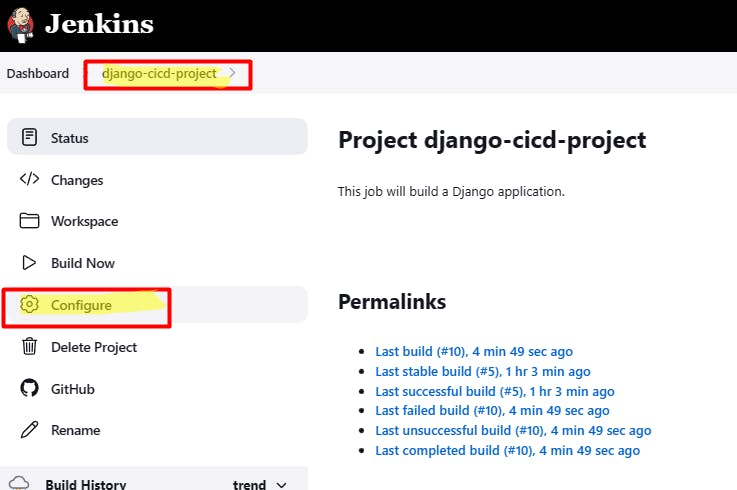
Create a freestyle pipeline
In the Jenkins dashboard, Click on the New Item Or Create a job
Enter the Name as per your project name i.e
django-cicd-projectand Select FreeStyle Project
Configuration your Jenkin Job/Project, you have different options(like Source Code Management, Build Triggers, Build Environment, Build Steps, and Post-build Actions) that help you manage your job.
Provide a Description:
This job will build a Django application.Select GitHub project
Project URL :
https://github.com/ketangharateG/react_django_demo_appAdvanced -> Display name:
React Django App
For Source Code Management select Git
Repository URL:https://github.com/ketangharateG/react_django_demo_app.git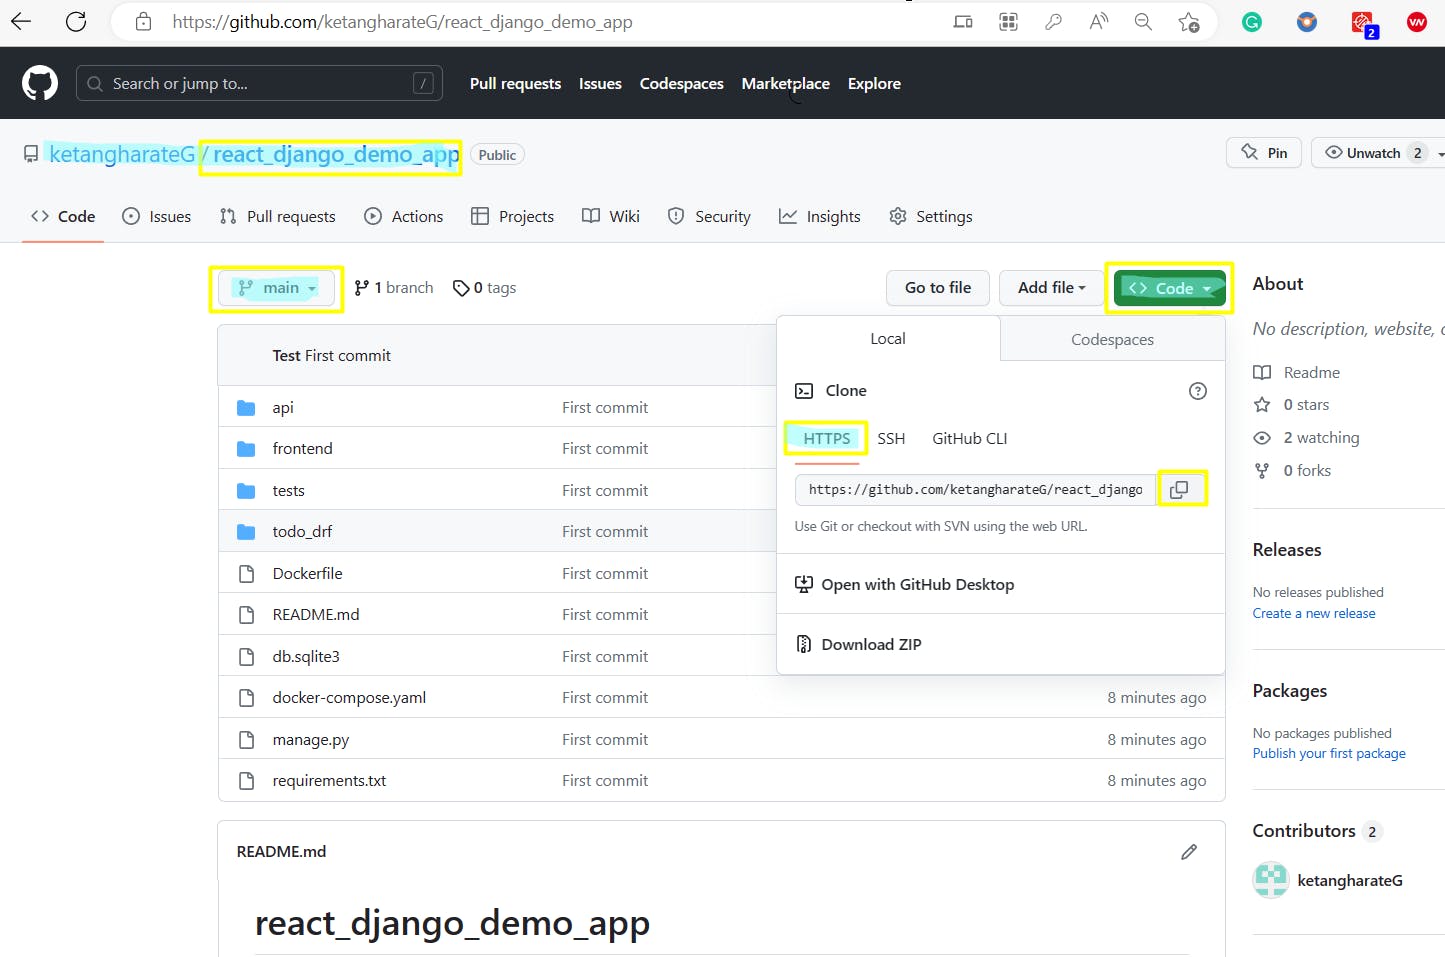

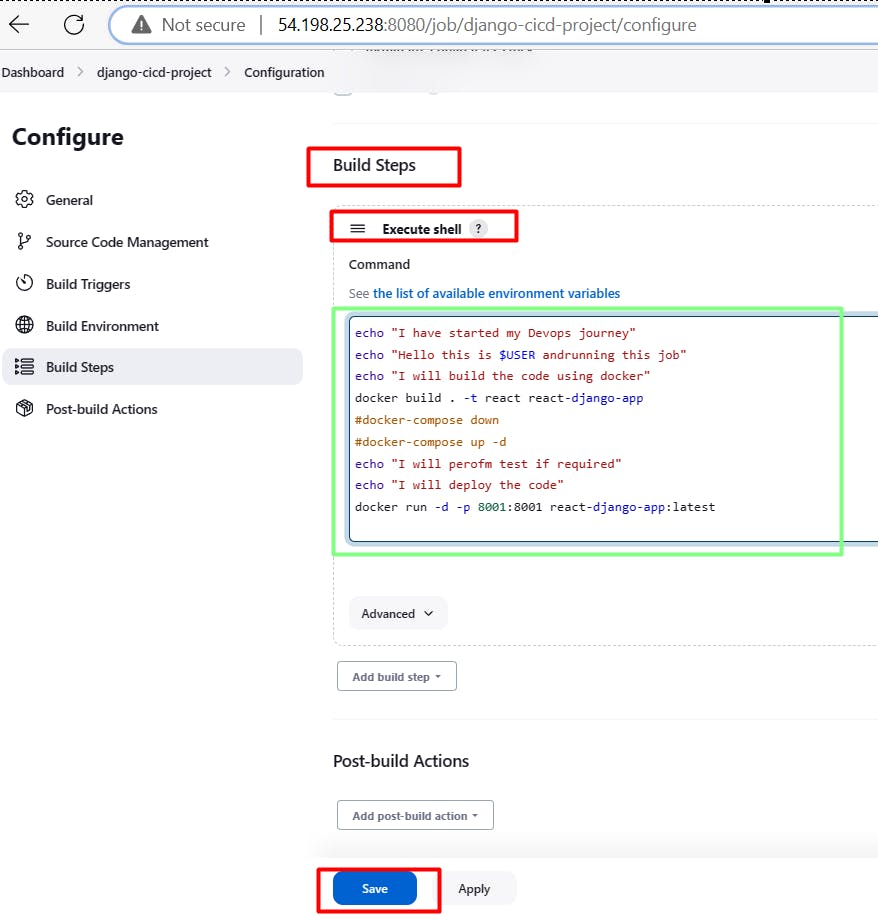
Build Steps -> Execute shell -> Click on the Save button

After this, you need to click on the Build Now button.
On Clicking on the Build Now button, Jenkins will Pull the code from GitHub on your Machine/System, and whatever Build steps we have mentioned will be executed one by one.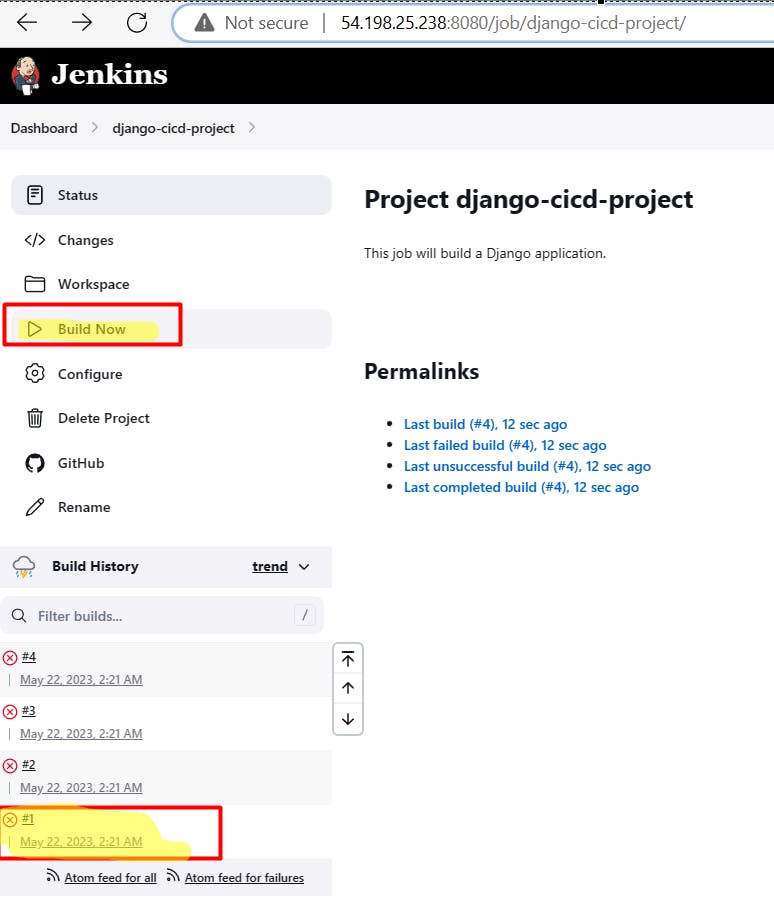
Check for the Build History and check for the Console Output

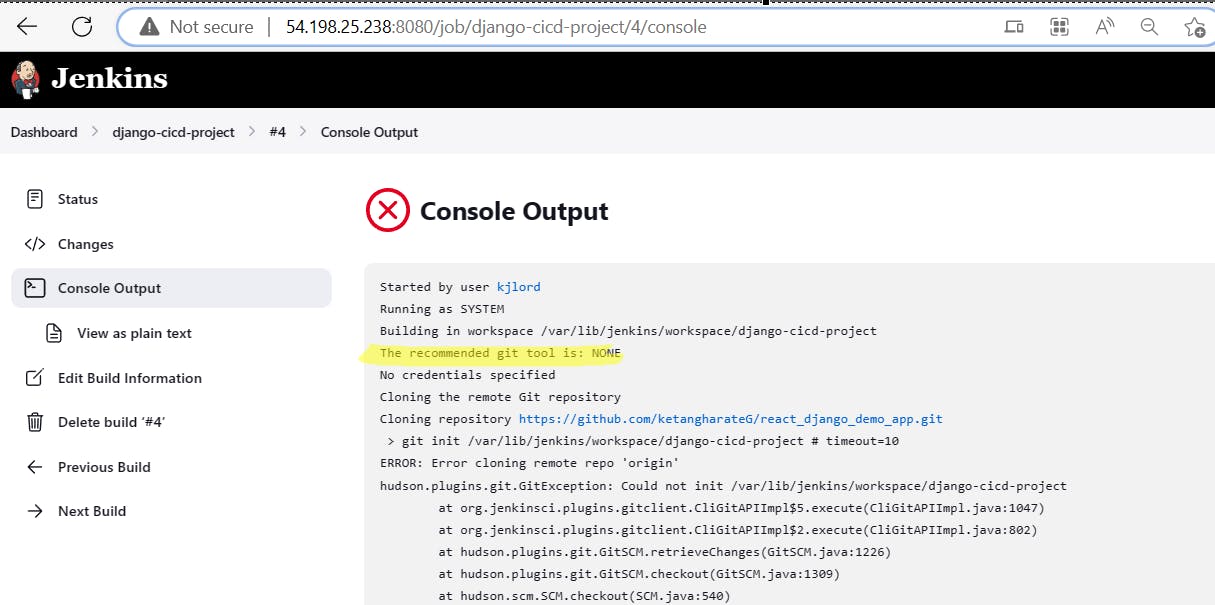
Since we are getting errors we have to install Git on the Jenkins Server
sudo yum install git -y
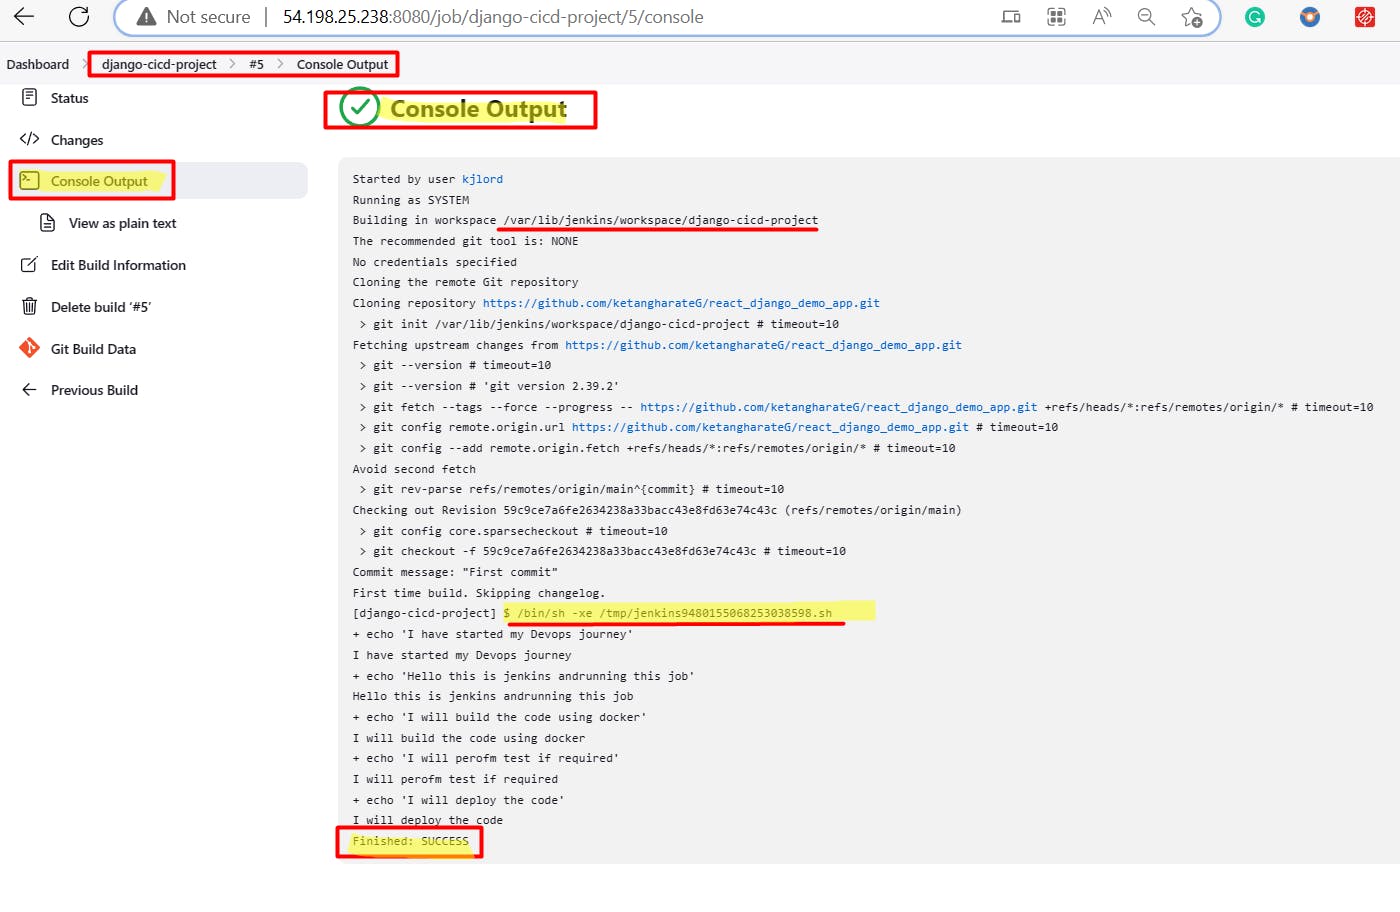
Let's further modify our Build Steps, which will require the below steps on the Jenkins Server.
Install Docker
yum install docker -yInstall Docker Compose
wget[https://github.com/docker/compose/releases/latest/download/docker-compose-$(uname](github.com/docker/compose/releases/latest/d..-s)-$(uname -m)sudo mv docker-compose-$(uname -s)-$(uname -m) /usr/local/bin/docker-composesudo chmod -v +x /usr/local/bin/docker-composeAdd Jenkins user to the Docker Group
sudo usermod -aG docker jenkinsReboot the Server
Allow incoming traffic for 8001 Port [
Django Application Running on this port] on AWS - Security Groups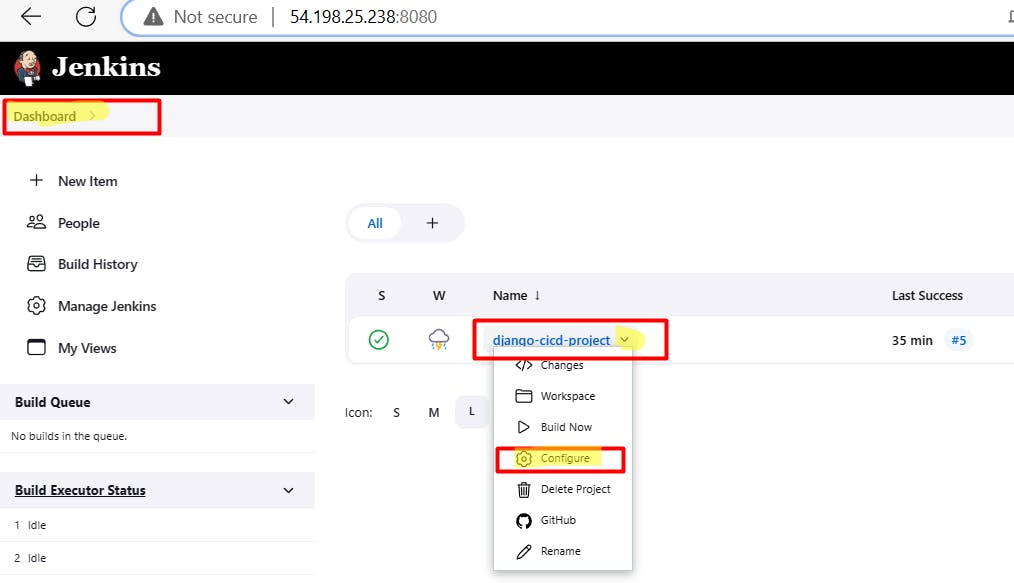
Or
Built Steps -> Execute shell:-
echo "I have started my DevOps journey"
echo "Hello this is $USER and running this job"
echo "I will build the code using docker"
docker build . -t react-django-app
echo "I will perform test if required"
echo "I will deploy the code"
docker run -d -p 8001:8001 react-django-app:latest

Or


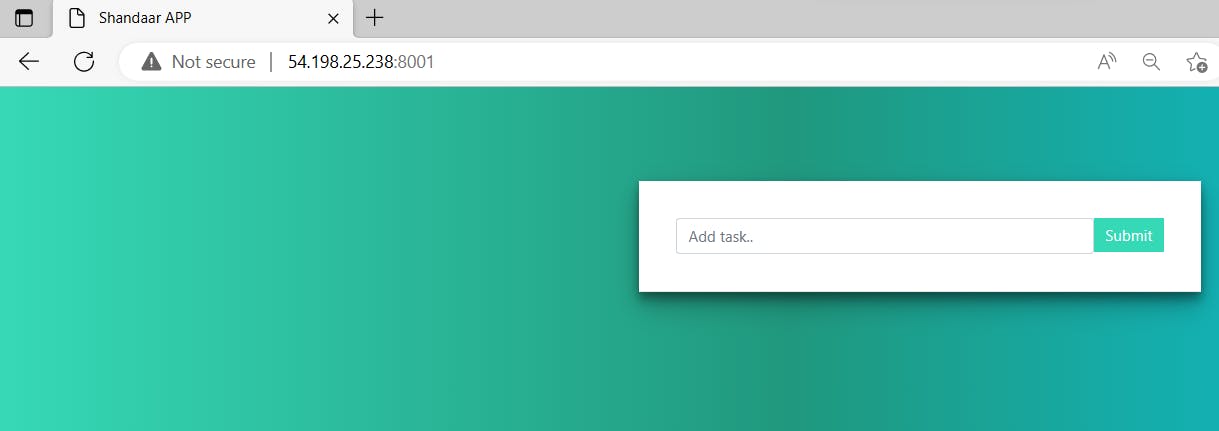
After the build is successful, you will see your Application running on Port 8001

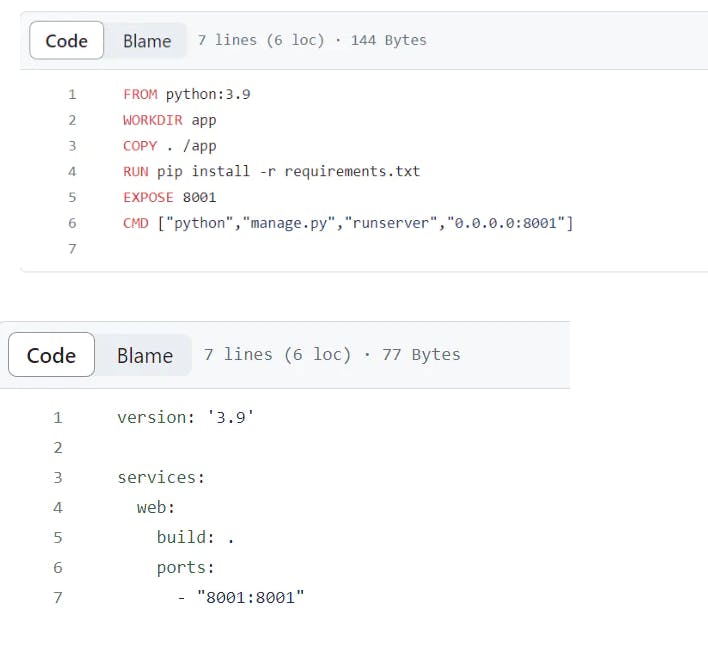
We can also use just the below commands for build steps instead of previous build steps.
Built Steps -> Execute shell:-
echo "I have started my DevOps journey"echo "Hello this is $USER and running this job"echo "I will build the code using docker"docker-compose downecho "I will deploy the code"docker-compose up -dNote: docker-compose uses yaml file present in the project directory, the yaml file is built based on the Docker file present in the directory.