

Docker Microservices Project


Microservices Project to perform CRUD operations
Docker Network
Docker Hub
Microservices Vs Monolithic Architecture


MicroservicesFlask API project to perform CRUD operations:
Repo URL:- https://github.com/LondheShubham153/microservices-k8s/tree/main/flask-api
Git: https://github.com/LondheShubham153/microservices-k8s.git
Login to your AWS account and create an EC2 Instance and login to the instance.
Use Git Clone to download the Source Code for the Application.
sudo yum install git -y
git clonehttps://github.com/LondheShubham153/microservices-k8s.git
cd microservices-k8s/flask-api/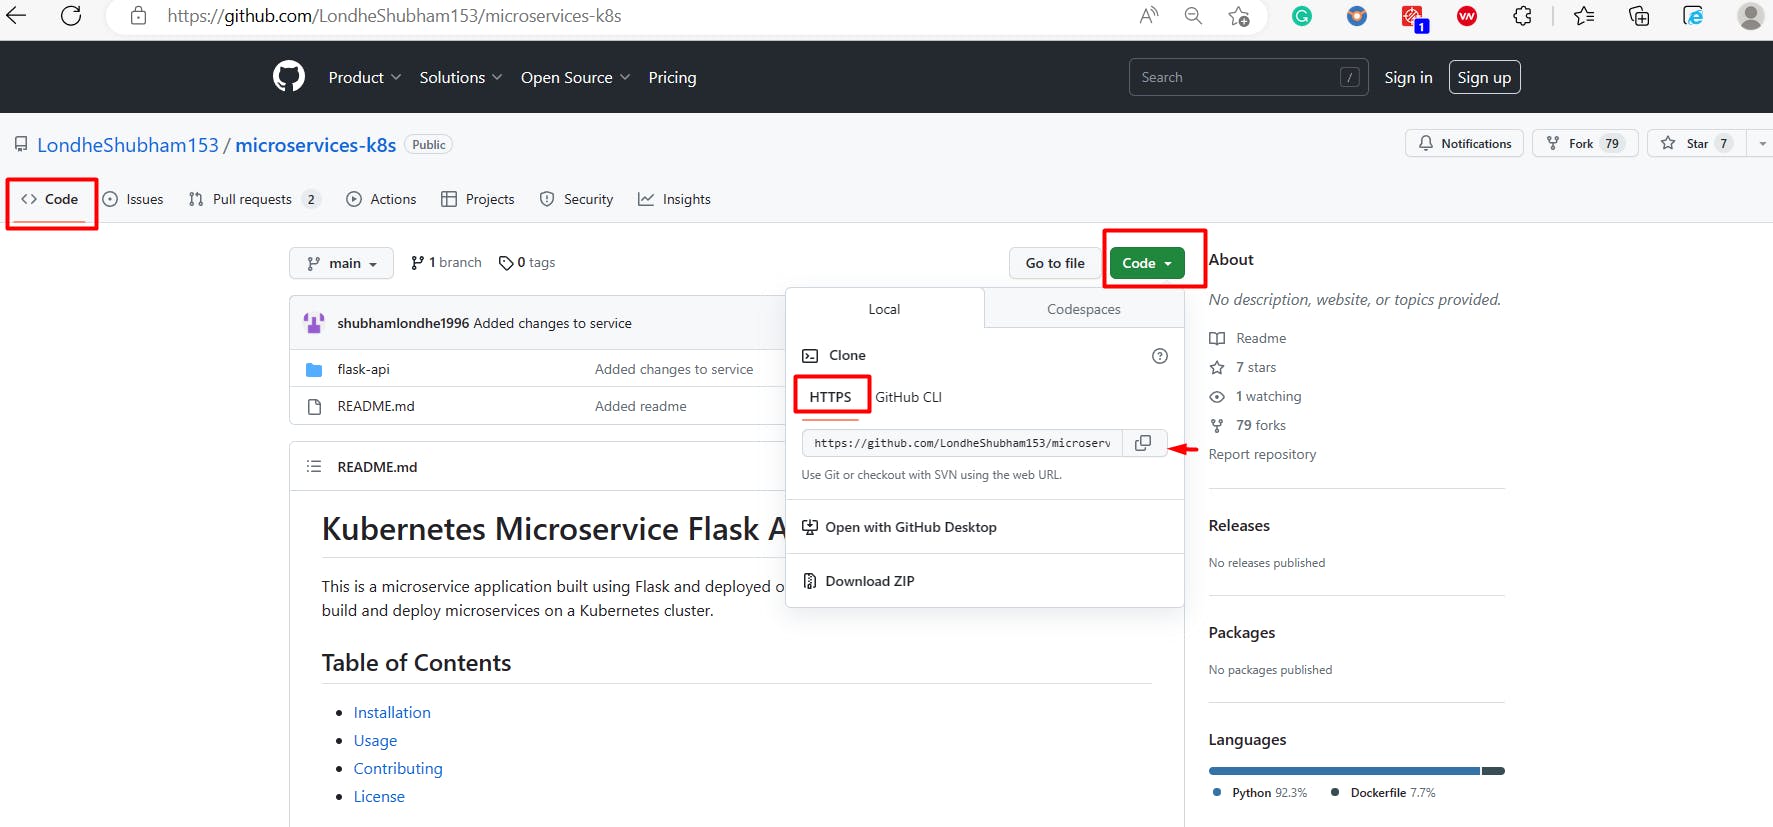

Create/Update the DockerFile
cat Dockerfile
#Pull the Python Image which is running on Alpine OS FROM python:alpine3.7#Copy everything thing from the Soruce to a Folder called "/app" #Whenever your #Container will be created, the contianer will have #a folder name called "app" COPY . /appWORKDIR /appRUN pip install -r requirements.txt#Evnironment Varabile ENV PORT 5000 EXPOSE 5000#Whenever your container is created and if you want to pass a command to that, that is #EntryPoint, it cannot be overwritten
ENTRYPOINT [ "python" ]#You can also use below, instead of specifiying the ENTRYPOINT.
#CMD [ "python", "app.py" ]CMD [ "app.py" ]Built Docker Image from the Dockerfile
docker build . -t flask-api:latest
docker imagesMake sure the docker is installed and the docker service is running, also the user is added to the Docker group.
sudo yum install docker -y
sudo systemctl status docker
grep docker /etc/group | grep $( whoami)Or
sudo amazon-linux-extras install docker sudo service docker start sudo usermod -a -G docker ec2-userTo Add a user to the Docker Group
sudo usermod -aG docker $(whoami)
sudo su - ec2-user
cd microservices-k8s/flask-api/Create a Bridge Docker Network, so we can communicate with our flask-api application with MongoDB.
docker network create flash-mongo-net
docker network lsContainers run in isolation and they do not know how to communicate with each other so they need a network to communicate with each other, and Docker Network is an entity that allows you to communicate with Docker containers.
Common network drivers are: bridge, host, overlays, macvlan,ipvlan, and noneRun the Image
flask-api:latestto create a Container
docker run -d -p 5000:5000 --network flash-mongo-net flask-apiCreate MongoDB container
docker run -d -p 27017:27017 --network flash-mongo-net --name mongo mongo:latest
docker ps
Allow Incoming traffic for the port
8001
EC2 -> Instances -> Security -> Security groups > Inbound rules > Edit inbound rules > Add rule > for TCP Port 5000 - from 0.0.0.0/0Browser the Application:

Download Postman for API Testing Tool**.**
Url:- https://www.postman.com/downloads/Perform CRUD operations.
The Collection is like a Folder, and within that folder, we will have Requests, which we will make to the Server, we have below major requests:
Create - POST
Read - GET
Update - PUT
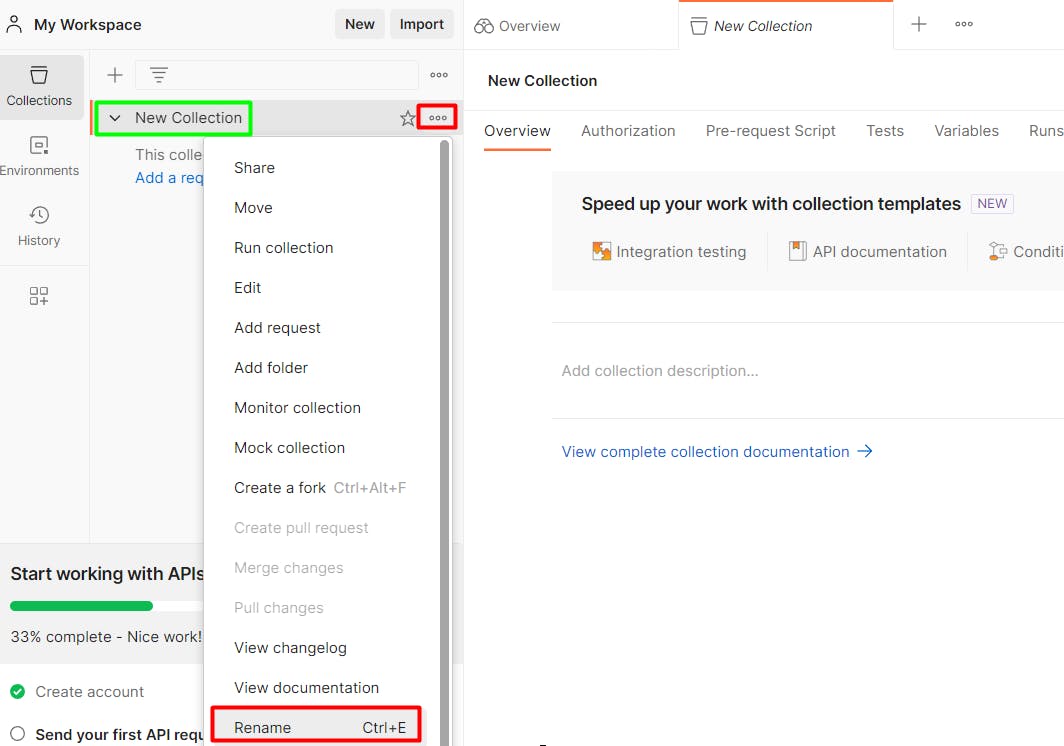
Delete - DELETEOpen Postman -> under Collections -> + Create new collection -> ... Rename it something like "Flask API" -> Under the Collections -> Add a request


To get the Information from the server, whether it is working or not, we will be using the GET request.
http://<IP>:5000/tasks
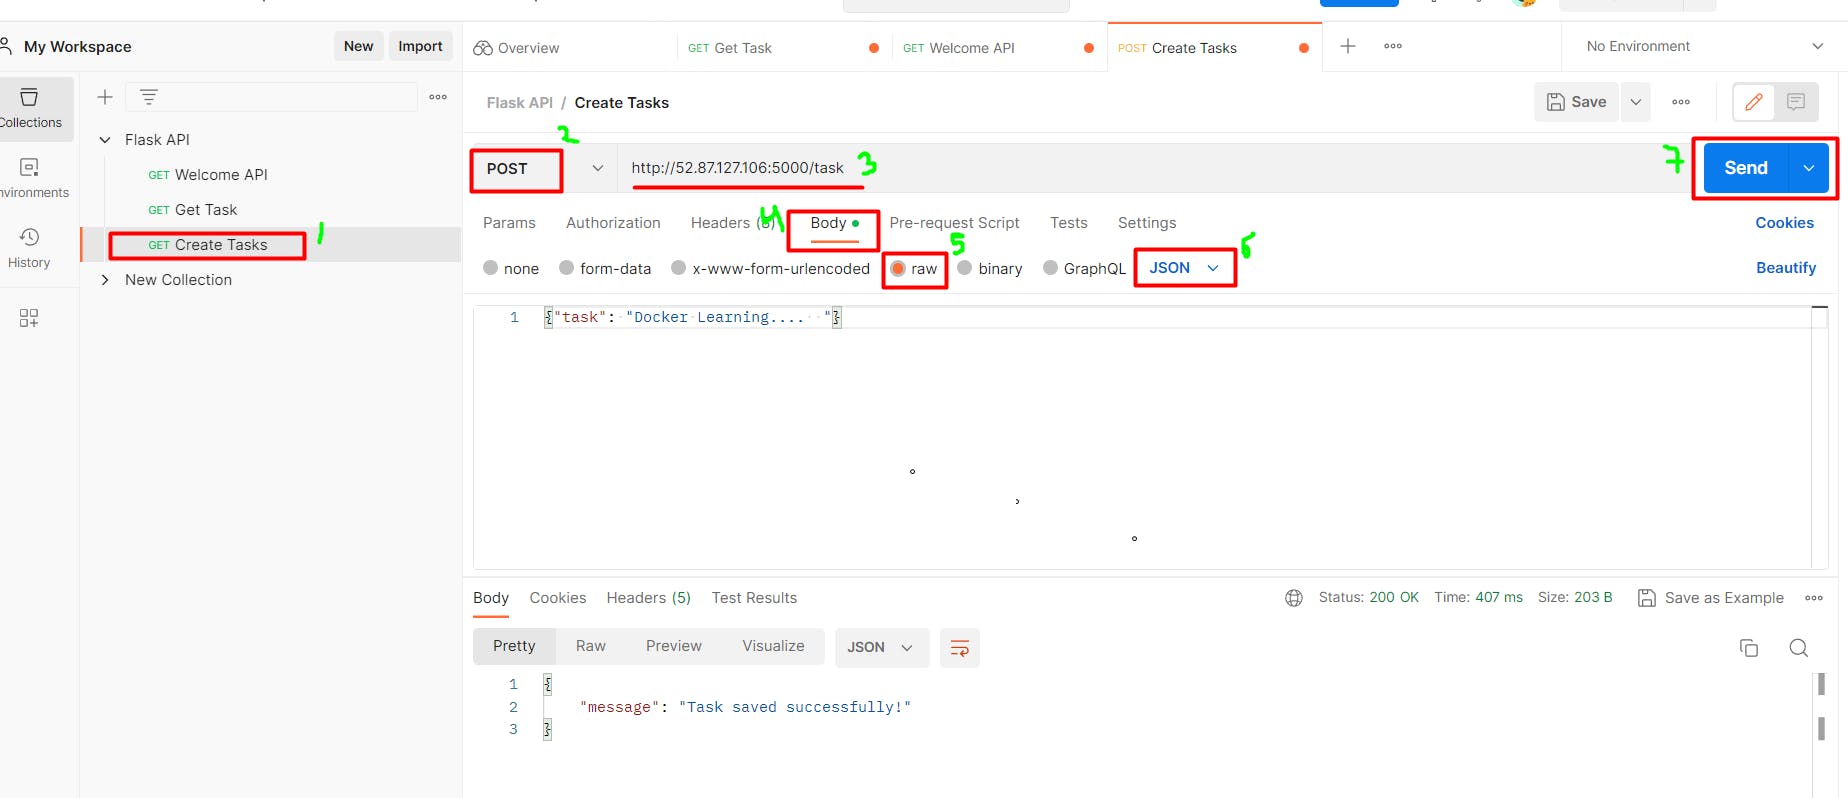
Use a POST request to insert data into MongoDB.
http://<IP>:5000/taskBody:
{"task": "Docker Learning.... "}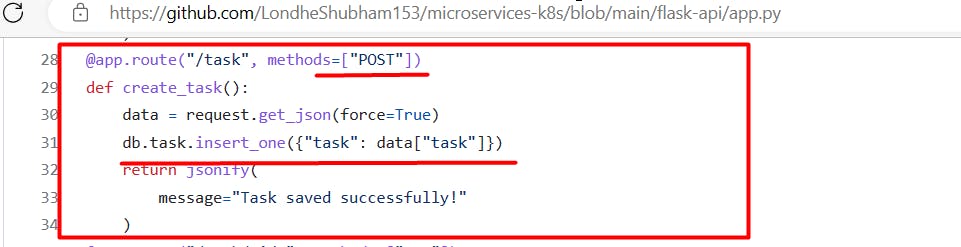
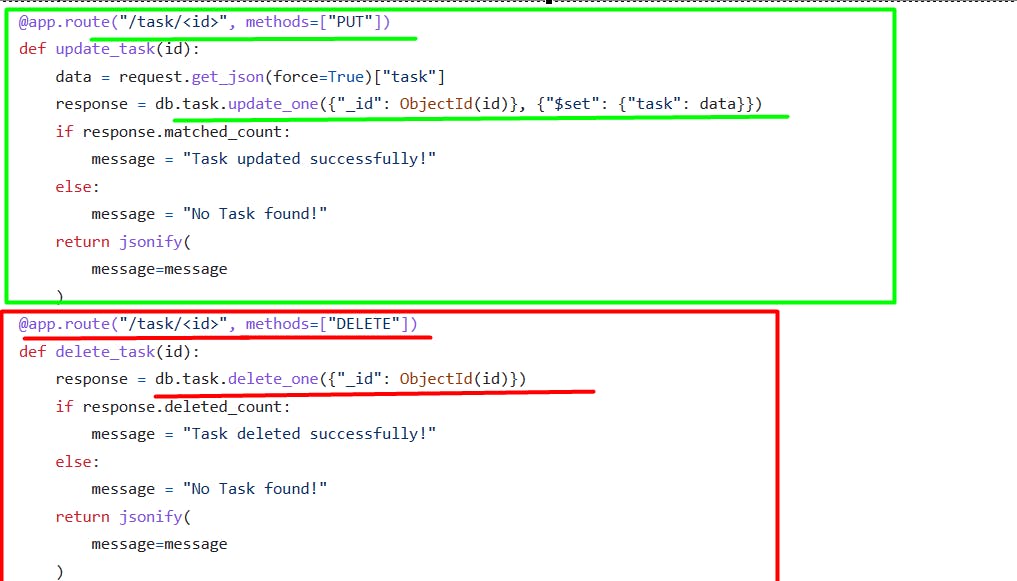
Use PUT request to update data from the MongoDB
- Get the Task ID by using GET request:http://<IP>:5000/taskshttp://<IP>:5000/task/<id>
Body:{"task": "Learn more Docker. "}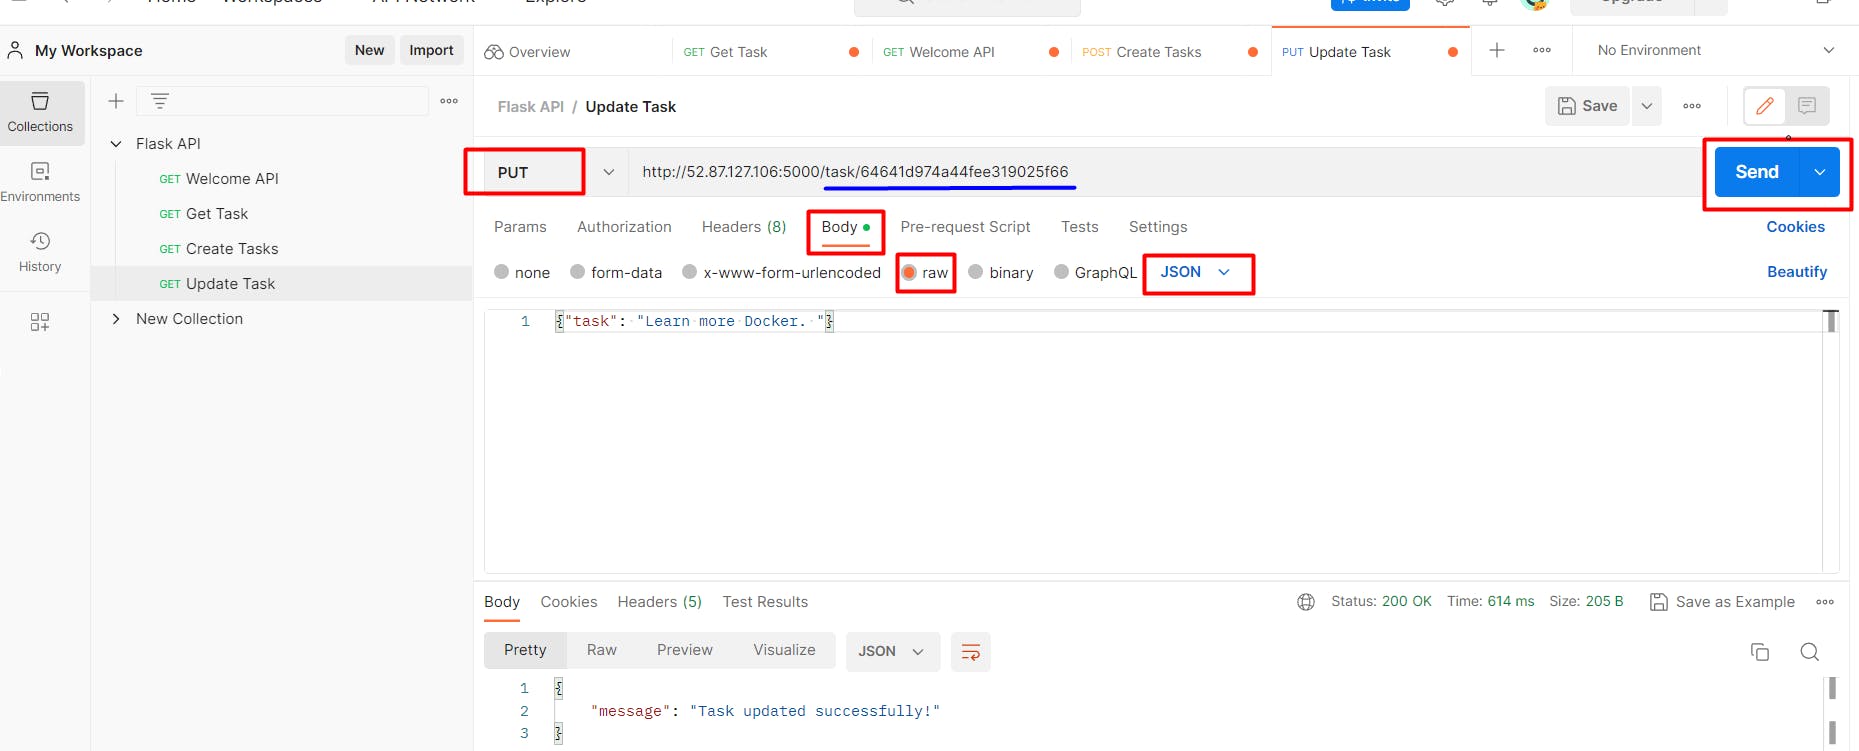
Use a DELETE request to delete data MongoDB
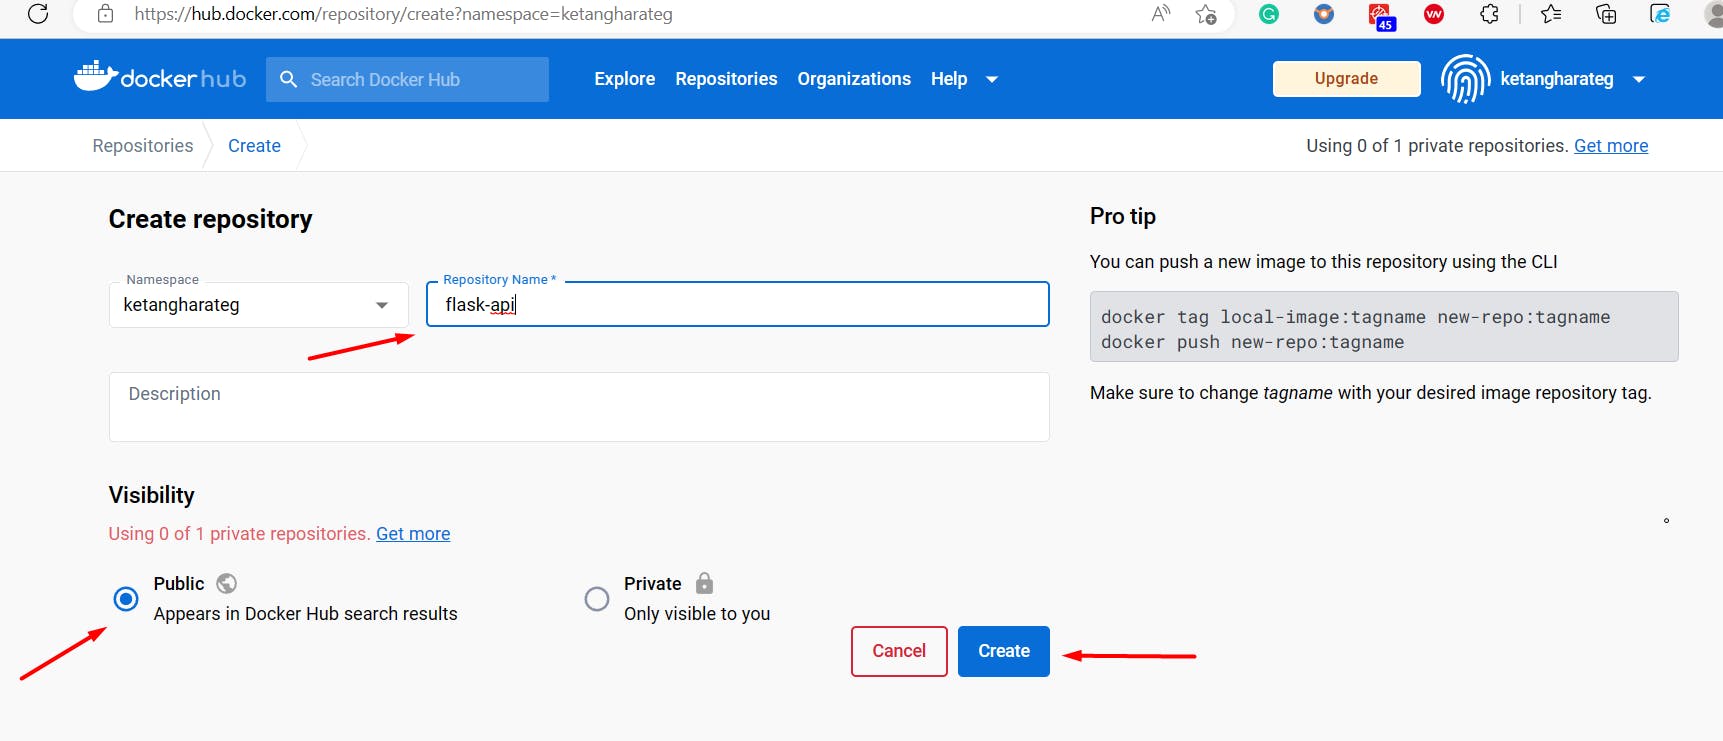
Create a Repository in Docker Hub (Create an account, if not created)
https://hub.docker.com/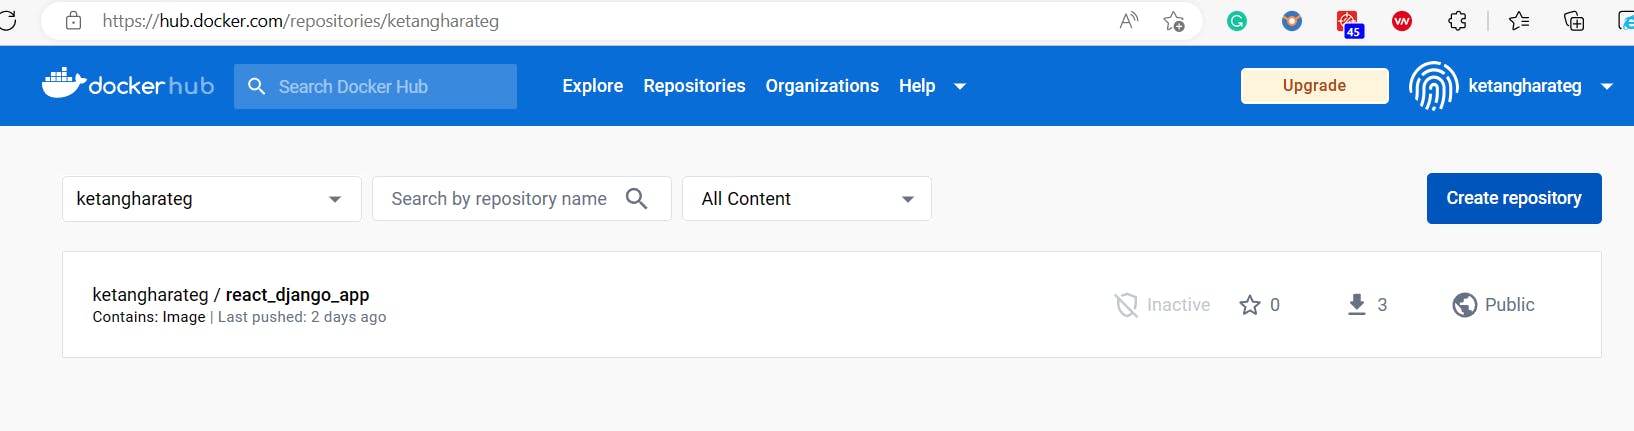
Login to your AWS instance (SSH to the server) and then Log in to your Docker Hub account using:
docker login
You will be prompted for your Docker Hub username and password.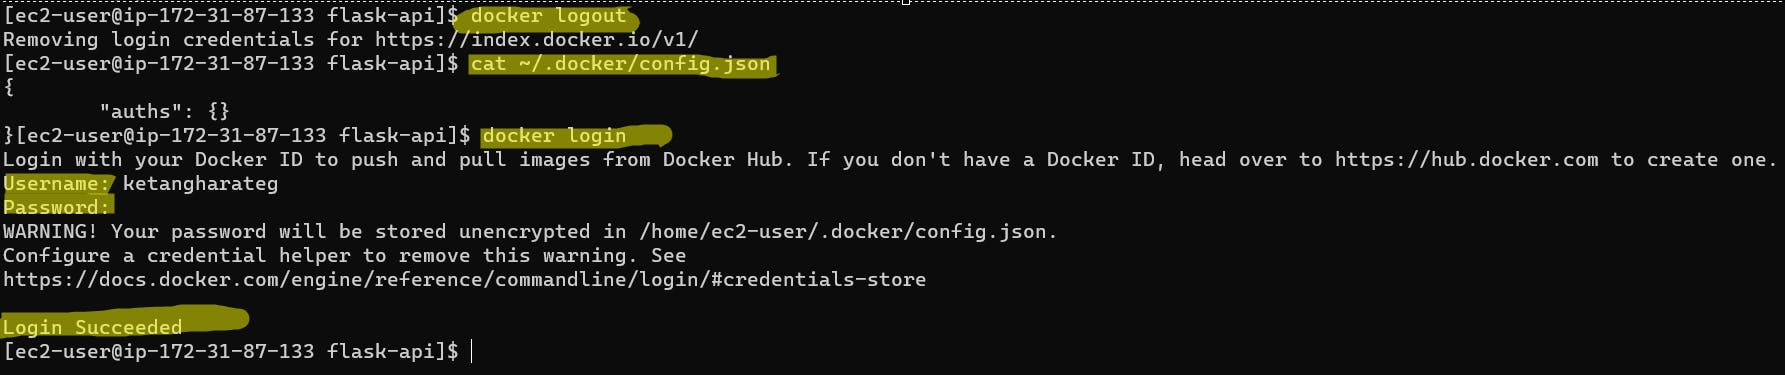
docker login :-Log in to a Docker registrydocker logout:-Log out from a Docker registryTag the image before pushing it to the Docker Hub, To push a Docker image to a registry, you need to tag the image with the registry address and repository name. The general format for the image name is
registry/repository:tag. If you omit the tag, it defaults tolatest.Syntax:
docker tag local-image:tagname username/repository-name:tagname
i.edocker tag flask-api:latest ketangharateg/flask-api:latestPush that Image to the Docker Hub
docker push [OPTIONS] NAME[:TAG]docker push ketangharateg/flask-api:latest
Create a docker-compose.yml file which is used to define and configure multi-container Docker applications. It allows you to specify the services, networks, volumes, environment variables, and other configurations required to run your application.
Docker Compose uses a YAML syntax.vi docker-compose.ymlversion: '3.9' services: flask-api: image: ketangharateg/flask-api container_name: flask-micro-api ports: - "5000:5000" mongo-db: image: mongo container_name: mongo ports: - "27017:27017"Install the docker-compose if not installed.
docker-compose --versionsudo curl -L "[https://github.com/docker/compose/releases/latest/download/docker-compose-$(uname](github.com/docker/compose/releases/latest/d..-s)-$(uname -m)" -o /usr/local/bin/docker-composesudo chmod +x /usr/local/bin/docker-composeStart the Docker Compose-defined application in detached mode.
It creates and starts all the services defined in yourdocker-compose.ymlfile as isolated containers in the background.docker-compose up -dYou can check the status of your running containers using the command:
docker-compose psStop and remove the containers, networks, and volumes created by Docker Compose. It is typically used when you want to shut down and clean up your Docker Compose application.
docker-compose down
Create a New GitHub Repository
flask-apiand push the data to the new Repo.


git remote -vgit remote set-url origin https://<Username>@github.com/<Username>/<Repo-Name>i.egit remote set-url origin https://ketangharateG@github.com/ketangharateG/flask-apigit branch git checkout -b master git push origin master- Got an error in the above steps, so let's Generate a token to give permissions for the remote user for the GitHub Repo.
Login to your
Github > Settings > Developer Settings > Personal access tokens > Tokens(classic) > Generate new token > Generate new token(classic) > Assign a Token Note- choose the Expiration period and select what permissions you want to give to this particular token. -> Generate Token -> Copy the tokengit remote set-url origin https://<tokens-key>@github.com/ketangharateG/flask-apii.egit remote set-url originhttps://ffesas4vssadvsb@github.com/ketangharateG/flask-apigit remote -vgit push origin mastergit add .git statusgit commit -m "Uploading Contents flask-api Code"git push origin master


Let's Reuse the GitHub Image and GitHub Code to build the project on a new Server/Instance.
Create a new EC2 Instance with the same Security Group
Install Git
sudo yum install git -y > /dev/null 2>&1Clone the Repo
git clonehttps://github.com/ketangharateG/flask-api.git;cd flask-apiInstall Docker and Docker Compose file
sudo yum update -y sudo amazon-linux-extras install docker -y || sudo yum install docker -y
sudo systemctl restart docker.service
sudo usermod -a -G docker ec2-usersudo curl -L "[https://github.com/docker/compose/releases/latest/download/docker-compose-$(uname](github.com/docker/compose/releases/latest/d..-s)-$(uname -m)" -o /usr/local/bin/docker-compose
sudo chmod +x /usr/local/bin/docker-compose
sudo chkconfig docker on
docker --version
docker-compose --versionStart the Docker Compose-defined application in detached mode.
sudo docker-compose up -d
sudo docker-compose ps
Docker Compose
You can refer to the official Docker Compose documentation for a detailed explanation of all available options and syntax: https://docs.docker.com/compose/compose-file/
Docker Compose syntax:
Version: Specify the version of the Docker Compose file format.
Services: Define the individual services or containers that make up your application. Each service has a name and can have various configurations such as image, ports, volumes, environment variables, and more.
Networks: Define custom networks that your services will be connected to. Networks allow services to communicate with each other.
Volumes: Define named volumes or bind mounts that provide persistent storage for your services. Volumes can be shared across containers or mounted from the host system
Environment Variables: Set environment variables for your services using the environment directive.
Dependencies and Links: Specify dependencies between services or link containers together using the depends_on directive or by defining links.
Docker Network
Docker network refers to the networking capabilities provided by Docker. Docker Network allows containers to communicate with each other and with the outside world.
In Docker, you can create one or more networks that act as isolated environments for containers. Each network provides an isolated communication channel, enabling containers to interact securely without exposing their ports directly to the host or other networks.
Docker offers various network drivers that determine the behavior and features of the network. Some of the commonly used network drivers are:
Bridge: This is the default network driver for Docker. It creates a private network on the host and assigns IP addresses to containers. Containers within the same bridge network can communicate with each other using their IP addresses. The bridge network can also provide external connectivity if configured.
Host: When using the host network driver, containers share the host's network stack, bypassing network isolation. This means containers can directly access network interfaces on the host. It is useful when you want to achieve maximum network performance or when you need to bind containers to specific network interfaces on the host.
Overlay: Overlay network driver allows containers running on different Docker hosts to communicate with each other securely over an encrypted network. It is commonly used in Docker Swarm mode for creating multi-host networks.
Macvlan: This driver allows containers to have MAC addresses assigned directly to them, making them appear as physical devices on the network. It enables containers to be part of an existing VLAN and have direct access to the physical network.
None: The none network driver disables networking for a container. It can be useful when you want to run a container with no network access.
To create and manage Docker networks, you can use the Docker CLI commands such as:-
docker network create
docker network ls
docker network connect
docker network disconnect.
Docker also provides network-related options in the Docker Compose file, which is commonly used for defining multi-container applications.
Overall, Docker Network simplifies the process of managing container networking, allowing containers to communicate securely and efficiently with each other and the external world.
Docker Hub
Docker Hub is a cloud-based registry service provided by Docker that allows developers to store, manage, and distribute Docker container images. It serves as a central repository for sharing containerized applications and enables easy collaboration and access to pre-built Docker images.
Docker Hub provides a convenient platform for discovering, sharing, and collaborating on Docker container images. It simplifies the process of distributing containerized applications, accelerates software delivery, and promotes the reuse of existing Docker images within the community.